|
 Before you start;
You must have your images open,
download mine here, (ok its seems "blank", but
it contains the selection, PsP6 user, try this
one)
and
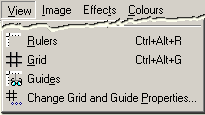
you must display the rulers before you can create a guide. Choose View -
Rulers to make the rulers visible.
To create a guide:
1.
Choose View - Guides to make the guides visible.
 2. 2.
Click the left mouse button and keep it pressed in while dragging from
either ruler. Drag from the ruler across the top of the image window to
create a horizontal guide; drag from the ruler extending down the left
side of the window to create a vertical guide.
See images; 1 guidehandle, 2 guide.
3.
Release the mouse button when the guide is at the desired position.
After you have created a guide, you can move it, change its colour, or
delete it. However, before editing it, you must make the ruler visible
because the ruler displays the guide handle. If you hide the ruler after
creating or editing guides, the guides remain visible. To hide the guides,
choose View - Guides.
Move, edit or delete a Guide

There are two ways to move a guide. You can:
- Drag it by the guide handle on the ruler, or double-click the guide
handle (or rightclick) to open the Guide Properties dialog box. Type a new
pixel in the Guide Position box. The position is the number of horizontal
or vertical pixels from the upper left corner of the image.
You can also change the Colour of a Guide,
just click in the Colour box or right-click to open the Recent Colours
dialog box.
If you want to delete a guide, you can;
- Drag the guide handle off the image window, or select the Delete Guide
check box.
Okay, now the teddy, maybe you already made one to work with, you need the
psp file, so you can works in layers .. or use mine teddy_tag.psp file wich contains all the selections.
* note *
To load a selection, choose
Selection - Load from Alpha Channel, select the selection, press OK.
1.
Open my "teddy_tag.psp" (or make a new image 150 x 150, but then
you need to make your own selection, the head and hands))
2.
Load the "head01" selection, and fill with a light brown color, I used
#D6936B.
Load the "head02" selection, and fill with a dark brown color, I uesd
#B25B26.
Load the "eyes01" selection and fill with white color.
Load the "eyes02" selection and fill with blue color.
3.
Create a new layer, load the shelf selection, and fill with a color or
pattern, I used the "Stained Wood" pattern, I used scale 100 and
angle 0..
4.
Create a new layer.
Load the "hand01" selection, fill with the light brown color, #D6936B.
5.
Load the "hand02" selection, fill with the dark brown color, #B25B26.
6.
Create a new layer (if you want, or make the hands in the same layer).
Load the "hand03" selection, fill with the light brown color, #D6936B.
7.
Load the "hand04" selection, fill with the dark brown color, #B25B26.
8.
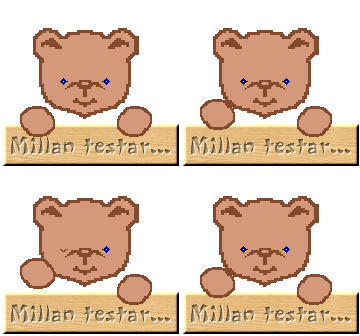
And your image would look like this ...
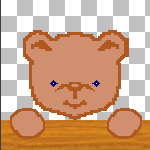
And .. maybe sign your name on the shelf ..
Okej ...Now to the guides, (for help)(also check the Guide Properties,
choose View - Change Grid and Guide Properties, use
these settings)
 Make
a guide next to the left ear.. Make
a guide next to the left ear..
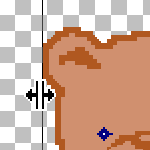
 Use
the Mover tool and move the head a little bit down, Use
the Mover tool and move the head a little bit down,
Save the image as teddy01, (I saved mine as gif, but you can also save as
jpg with any background color you like)
Move the head up some, and save the image with a new name (teddy02),
Move the head upwards again, and save the image with a new name (teddy03),
and one last time,
move the head upwards and save the image with a new name (teddy04)
Then back down again...
move the head downwards a little bit and save the image with a new name
(teddy05)
move downwards a little more and save with a new name (teddy06) ...

Open Animation Shop ..
Choose File Run Animation Shop, and for PsP
7, File - Jasc Software Products,
Animation Shop, has a lot of tools, the same as in PSP ..
and you use them the same way.

Click Animation Wizard - tool, The Animation wizard - "Animation guide" opens.
You also find it under File -Animation wizard.
This guide makes it easier to make your own animations.
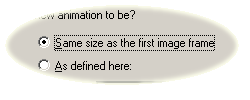
1.
Select this....
Press Next ..
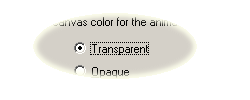
2.
Select Transparent,
Press Next
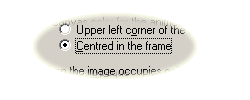
3.
select "Centred ... "
Press Next
4.
then
select "Yes ... " and change disply time to 10,
Press Next
5.
then ..
Press "Add Image"
browse for your saved teddy images, (you maybe need to use the "Move
up" and "Move down" buttons to move them into right order)
Press Next
6.
Then , the last one
Press Finished
Press the Arrow tool, 
to view your animation press
 viewtool, viewtool,
If you wantr, resize the animation ..
Choose Animation - Resize Animation, 50 % and for better result, you need
to have the same background as the mail background .. ex white, most emails
have white backgrounds ..
Choose Animation - Animations Properties, under "Canvas color" change the to
white color (or tuor choice) ..
Save the animation tag ...
File - Save As - name it, Save,
.. just folow the guide ..
and Press Next, three times and Finish
|